- Fixed a few bugs with string processing
- Added the -i option to read known IP addresses
- Used binary search on vendor lookups to improve performance
- Fixed bugs introduced in new code with onlyAddNew and onlyAddOld
- Output now sorted by power level by default
Wednesday, August 17, 2016
Airodump CSV Tools v0.5 Released
After dragging my feet for a long time, I decided to just release a new version. I didn't get all of the features I wanted implemented perfectly, but there are some bug fixes and new features.

Monday, March 30, 2015
Privacy
I thought it might be good to share a few of the steps I take to maximize my privacy while maintaining my ability to use digital and social media. If you think privacy is not a big deal, I highly recommend the TED talk “Why Privacy Matters” by Glenn Greenwald.
These are loosely in order of difficulty and/or the technical skill required, with the easier ones at the beginning.
Check your Facebook privacy settings. Facebook has an option that will show you what your page looks like to other people (friends and the world). Or even better, delete Facebook.
Download the Firefox extensions: HTTP Everywhere, Adblock Plus, (maybe) Noscript. Enable the options in Adblock Plus to block social media so that Facebook can’t track your web browsing.
Disable Flash cookies. Open Control Panel, Flash Player, and Block all sites from storing information on this computer. However, this may cause some web sites not to work, and sometimes you won’t even get an error message as to why it isn’t working.
Check the security certificates on secure web sites that you go to. (See my previous post.) They should be signed by a certificate authority that your web browser recognizes. (These are pre-installed with your web browser.) Furthermore, as you do this, you’ll know which CA the web sites you visit use, and you’ll be able to recognize if a site you frequent is using a different CA than before, which is highly suspicious.
Uninstall Java. This also may cause some web sites or apps to stop working, so run those apps in a VM if you really need Java.
Disable Wifi on your phone when it’s not needed. This can be a pain, but if you have an Android phone, there are some apps that will turn it on and off for you at certain times of the day.
Set up email encryption. There are two popular formats: S/MIME and PGP. S/MIME is recognized by Outlook, Thunderbird, and some mobile clients (such as the one that comes with Samsung Galaxy phones). You can get a free personal SSL certificate from StartSSL and use it for email encryption and authentication. However, you can only encrypt email to other users that also have S/MIME encryption set up. Here is a guide for Outlook, though it’s a bit old.
Don’t use Gmail, Hotmail, or any of the other “free” email services. You can host your own email server if you really know what you are doing, or you can pay for a hosted email service with a hosting company. Some DNS registrars will give you free email addresses if you buy hosting from them. Hosting your own email server is the most private option, since only you will have access to your email server.
However, it must be stated that email is not secure, nor is it private. It is not encrypted, and it is not authenticated, unless you set up email encryption and authentication as described previously, and even then, that only works for other people who also have email authentication and encryption set up.
Your phone calls are also not private. There are, however, apps that will allow you to make private telephone calls, such as Whatsapp, which also offers end-to-end encrypted text messaging. Again, the best option for privacy is going to be to host your own phone server, and you’ll want to make sure it’s configured properly.
I hope this has been helpful. I’ll update this post if I think of anything else.
These are loosely in order of difficulty and/or the technical skill required, with the easier ones at the beginning.
Check your Facebook privacy settings. Facebook has an option that will show you what your page looks like to other people (friends and the world). Or even better, delete Facebook.
Download the Firefox extensions: HTTP Everywhere, Adblock Plus, (maybe) Noscript. Enable the options in Adblock Plus to block social media so that Facebook can’t track your web browsing.
Disable Flash cookies. Open Control Panel, Flash Player, and Block all sites from storing information on this computer. However, this may cause some web sites not to work, and sometimes you won’t even get an error message as to why it isn’t working.
Check the security certificates on secure web sites that you go to. (See my previous post.) They should be signed by a certificate authority that your web browser recognizes. (These are pre-installed with your web browser.) Furthermore, as you do this, you’ll know which CA the web sites you visit use, and you’ll be able to recognize if a site you frequent is using a different CA than before, which is highly suspicious.
Uninstall Java. This also may cause some web sites or apps to stop working, so run those apps in a VM if you really need Java.
Disable Wifi on your phone when it’s not needed. This can be a pain, but if you have an Android phone, there are some apps that will turn it on and off for you at certain times of the day.
Set up email encryption. There are two popular formats: S/MIME and PGP. S/MIME is recognized by Outlook, Thunderbird, and some mobile clients (such as the one that comes with Samsung Galaxy phones). You can get a free personal SSL certificate from StartSSL and use it for email encryption and authentication. However, you can only encrypt email to other users that also have S/MIME encryption set up. Here is a guide for Outlook, though it’s a bit old.
Don’t use Gmail, Hotmail, or any of the other “free” email services. You can host your own email server if you really know what you are doing, or you can pay for a hosted email service with a hosting company. Some DNS registrars will give you free email addresses if you buy hosting from them. Hosting your own email server is the most private option, since only you will have access to your email server.
However, it must be stated that email is not secure, nor is it private. It is not encrypted, and it is not authenticated, unless you set up email encryption and authentication as described previously, and even then, that only works for other people who also have email authentication and encryption set up.
Your phone calls are also not private. There are, however, apps that will allow you to make private telephone calls, such as Whatsapp, which also offers end-to-end encrypted text messaging. Again, the best option for privacy is going to be to host your own phone server, and you’ll want to make sure it’s configured properly.
I hope this has been helpful. I’ll update this post if I think of anything else.
Wednesday, February 4, 2015
New version of Airodump CSV Tools
I have released version 0.3 of Airodump CSV tools.
Changes:
Changes:
- Now logs the time and power when each AP/Station's power was at maximum.
- Added new feature to read GPS coordinates from external file (created with optional Android app).
- Changed output file options (-cth) to -w
Thursday, October 16, 2014
Upgrading from PostgreSQL 8.x to 9.x
I was upgrading a server with Postgres v8.4 to v9.3 and ran into an issue when I tried to import the data that I had dumped before the upgrade. After doing a little digging, I found a way to update it without dumping the whole database and reloading it.
Here are my full instructions for doing so on RHEL 6.5. Follow them at your own risk.
*See the Installation Guide to install PostgreSQL 9.3
yum install postgresql93 postgresql93-devel postgresql93-contrib
vi /etc/init.d/postgresql
Note the following variables (examples given)
PGVERSION=8.4.20
PGENGINE=/usr/bin
PGPORT=5432
PGDATA=/var/lib/pgsql/data
PGLOG=/var/lib/pgsql/pgstartup.log
vi /etc/init.d/postgresql-9.3
Change PGPORT=5432 to 5433
Note the following variables (examples given)
PGVERSION=9.3.5
PGENGINE=/usr/pgsql-9.3/bin
PGPORT=5432
PGDATA=/var/lib/pgsql/9.3/data
PGLOG=/var/lib/pgsql/9.3/pgstartup.log
Run initdb
service postgresql-9.0 initdb
su postgres
/usr/pgsql-9.3/bin/pg_upgrade -b /usr/bin -B /usr/pgsql-9.3/bin -d /var/lib/pgsql/data -D /var/lib/pgsql/9.3/data
You should see the following:
#Upgrade Complete
#----------------
#Optimizer statistics are not transferred by pg_upgrade so,
#once you start the new server, consider running:
# analyze_new_cluster.sh
#
#Running this script will delete the old cluster's data files:
# delete_old_cluster.sh
#
[root pgsql]# su postgres
bash-4.1$ /var/lib/pgsql/analyze_new_cluster.sh
bash-4.1$ /var/lib/pgsql/delete_old_cluster.sh
Remove the old version of PostgreSQL
yum remove postgresql
This will also remove postgresql-contrib and postgresql-server
Set up your path
[root ~]# cd /usr/bin
[root bin]# ln -s /usr/pgsql-9.3/bin/psql
Optionally
export PATH=$PATH:/usr/pgsql-9.3/bin
vi /etc/init.d/postgresql-9.3
Change PGPORT=5432
service postgresql-9.3 start
psql --username=postgres
su postgres
psql
\list
You should now see a list of databases on your server.
Here are my full instructions for doing so on RHEL 6.5. Follow them at your own risk.
*See the Installation Guide to install PostgreSQL 9.3
yum install postgresql93 postgresql93-devel postgresql93-contrib
vi /etc/init.d/postgresql
Note the following variables (examples given)
PGVERSION=8.4.20
PGENGINE=/usr/bin
PGPORT=5432
PGDATA=/var/lib/pgsql/data
PGLOG=/var/lib/pgsql/pgstartup.log
vi /etc/init.d/postgresql-9.3
Change PGPORT=5432 to 5433
Note the following variables (examples given)
PGVERSION=9.3.5
PGENGINE=/usr/pgsql-9.3/bin
PGPORT=5432
PGDATA=/var/lib/pgsql/9.3/data
PGLOG=/var/lib/pgsql/9.3/pgstartup.log
Run initdb
service postgresql-9.0 initdb
su postgres
/usr/pgsql-9.3/bin/pg_upgrade -b /usr/bin -B /usr/pgsql-9.3/bin -d /var/lib/pgsql/data -D /var/lib/pgsql/9.3/data
You should see the following:
#Upgrade Complete
#----------------
#Optimizer statistics are not transferred by pg_upgrade so,
#once you start the new server, consider running:
# analyze_new_cluster.sh
#
#Running this script will delete the old cluster's data files:
# delete_old_cluster.sh
#
[root pgsql]# su postgres
bash-4.1$ /var/lib/pgsql/analyze_new_cluster.sh
bash-4.1$ /var/lib/pgsql/delete_old_cluster.sh
Remove the old version of PostgreSQL
yum remove postgresql
This will also remove postgresql-contrib and postgresql-server
Set up your path
[root ~]# cd /usr/bin
[root bin]# ln -s /usr/pgsql-9.3/bin/psql
Optionally
export PATH=$PATH:/usr/pgsql-9.3/bin
vi /etc/init.d/postgresql-9.3
Change PGPORT=5432
service postgresql-9.3 start
psql --username=postgres
su postgres
psql
\list
You should now see a list of databases on your server.
Thursday, July 24, 2014
Airodump CSV Tools
I've been busy working on a program that merges and parses CSV files generated by Airodump-ng. After many hours of coding, I think I am ready to release a beta.
Features:
Features:
- Merges the CSV files into one CSV file, html file, or text file, keeping the APs and Stations together.
- Has options to only show APs and Stations that are new or old in the last file you import.
- Optional text output for cron, etc.
- Adds manufacturer info (OUI) to APs and end devices, and the ESSID (if applicable) to end devices, in text/html output modes.
Sunday, May 11, 2014
Certificate Validation
Note: I also have this posted on my web site here.
How can you be certain that the connection to your bank or online vendor is secure? Well, you can't, but there are some simple steps you can take to increase the odds that your connection will be secure.
When you go to a secure web site, your browser will give you some information about the security protocols used, which you can use to judge the level of security provided.
In order to understand this process, it is necessary to understand how public key certificates work. There are many articles available on the subject that go into much more detail (Wikipedia's article can be found here). The important part to know is that anyone can create a certificate and sign it, so you have to know that the certificate is signed by someone you can trust.
This is where things get messy. Currently, the way your web browser knows who to trust is, it has a list of known trustworthy certificates that come pre-installed. You can create your own certificate and have it signed by one of the companies providing those certificates (for a fee, usually). So what it boils down to is, when you go to a secure web site, your browser will say it's secure because the certificate authority that someone paid to have their certificate signed says it's secure.
You may be wondering if it's possible to get one of those companies to sign a fraudulent certificate that you've created. While in some circumstances, that is possible, the certification authorities take steps to ensure that when you buy a certificate, you are the owner of the domain that the certificate is for.
Let's take a look at a certificate in the Firefox web browser. To get started, go to a secure web site and click on the lock icon next to the address bar.

Firefox tells you which certificate authority verified the certificate. Click on More Information.

Here you will see some statistics and information about the type of certificate being used. Click on View Certificate.

This is the important part. It tells you everything you need to know about the certificate your browser has decided to trust (or not). If the Common Name (CN) doesn't match the URL you typed into the address bar, or the validity dates are incorrect, your browser will not trust the certificate. If those details are correct, but your browser still doesn't trust the certificate, then the certificate was signed by an authority that your browser doesn't recognize.
Now let's look at a site with an untrusted certificate. If you go to a web site that Firefox doesn't trust, you'll be greeted with this warning:

Click Add Exception, and then you can view the certificate.

I used StartCom to verify my web site, but some versions of Firefox don't recognize it. Notice that Firefox will tell you the reason why it doesn't trust the certificate at the top.
If the certificate isn't signed by a recognized authority and you still want to know if you can trust it, you can compare its fingerprint to a known fingerprint for that web site. Mine is listed at this page. It's recommended, if you're going to do it this way, that you get the fingerprint over the phone, in person, or in some other more secure manner. The last four to six characters should suffice.
How can you be certain that the connection to your bank or online vendor is secure? Well, you can't, but there are some simple steps you can take to increase the odds that your connection will be secure.
When you go to a secure web site, your browser will give you some information about the security protocols used, which you can use to judge the level of security provided.
In order to understand this process, it is necessary to understand how public key certificates work. There are many articles available on the subject that go into much more detail (Wikipedia's article can be found here). The important part to know is that anyone can create a certificate and sign it, so you have to know that the certificate is signed by someone you can trust.
This is where things get messy. Currently, the way your web browser knows who to trust is, it has a list of known trustworthy certificates that come pre-installed. You can create your own certificate and have it signed by one of the companies providing those certificates (for a fee, usually). So what it boils down to is, when you go to a secure web site, your browser will say it's secure because the certificate authority that someone paid to have their certificate signed says it's secure.
You may be wondering if it's possible to get one of those companies to sign a fraudulent certificate that you've created. While in some circumstances, that is possible, the certification authorities take steps to ensure that when you buy a certificate, you are the owner of the domain that the certificate is for.
Let's take a look at a certificate in the Firefox web browser. To get started, go to a secure web site and click on the lock icon next to the address bar.
Firefox tells you which certificate authority verified the certificate. Click on More Information.
Here you will see some statistics and information about the type of certificate being used. Click on View Certificate.
This is the important part. It tells you everything you need to know about the certificate your browser has decided to trust (or not). If the Common Name (CN) doesn't match the URL you typed into the address bar, or the validity dates are incorrect, your browser will not trust the certificate. If those details are correct, but your browser still doesn't trust the certificate, then the certificate was signed by an authority that your browser doesn't recognize.
Now let's look at a site with an untrusted certificate. If you go to a web site that Firefox doesn't trust, you'll be greeted with this warning:
Click Add Exception, and then you can view the certificate.
I used StartCom to verify my web site, but some versions of Firefox don't recognize it. Notice that Firefox will tell you the reason why it doesn't trust the certificate at the top.
If the certificate isn't signed by a recognized authority and you still want to know if you can trust it, you can compare its fingerprint to a known fingerprint for that web site. Mine is listed at this page. It's recommended, if you're going to do it this way, that you get the fingerprint over the phone, in person, or in some other more secure manner. The last four to six characters should suffice.
Thursday, January 30, 2014
Results of running forensic software with Chrome Incognito
I worked at a company that makes forensics software and was interested in
seeing if it could pick up Incognito browser history. I opened Firefox
and set it to "not remember any history," then cleared the history and
browsed to a few web sites. I also tried this with a private browsing
tab, and with Chrome in an Incognito tab. Then I took an image of the
hard drive and loaded it into our forensics software. The web sites I
visited did not show up. I also checked for other traces (e.g. images
from the browser cache) and did not find anything.
I also used a hard drive hex viewer and did a string search for a couple of the web sites I went to, and they weren't on there. So the browser developers appear to have done their job in keeping browser history off of your hard drive.
I also used a hard drive hex viewer and did a string search for a couple of the web sites I went to, and they weren't on there. So the browser developers appear to have done their job in keeping browser history off of your hard drive.
Subscribe to:
Posts (Atom)
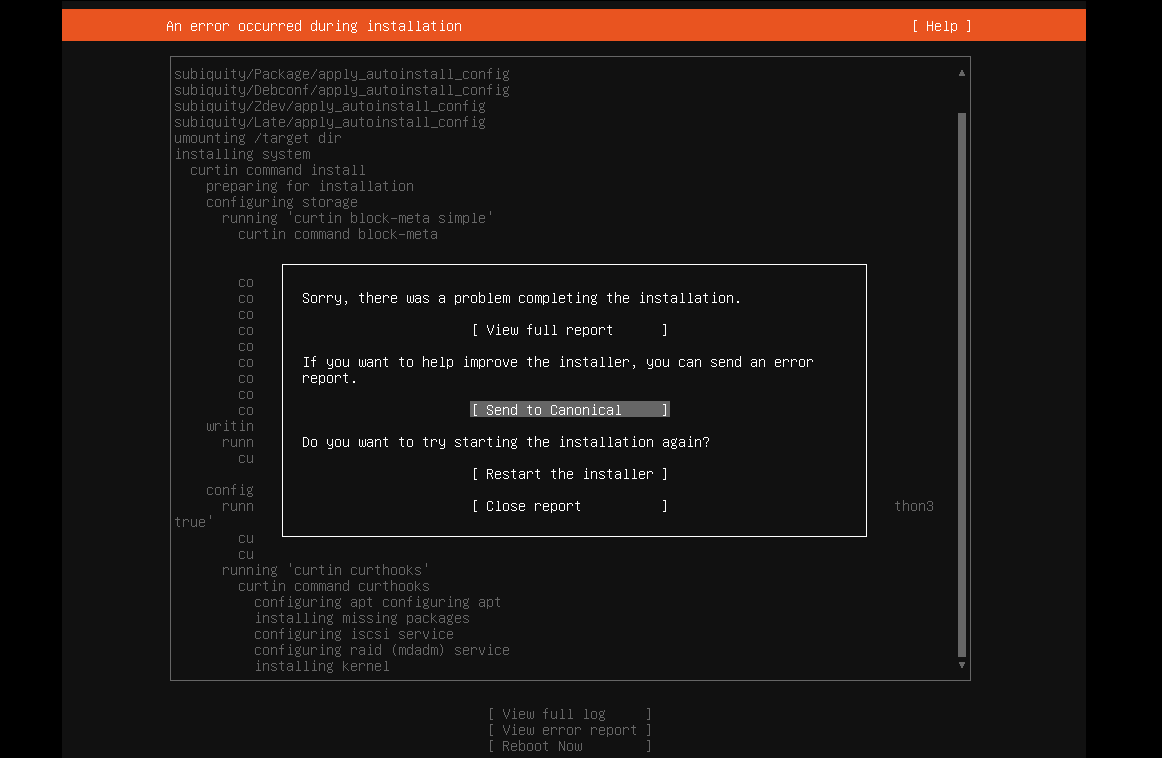
Ubuntu 22.04 on VMware Workstation Error
I tried installing Ubuntu 22.04 server on VMware Workstation and got this message: Sorry, there was a problem completing the installation E...
-
We have a customer at work that runs Dentrix. They have 4 offices, and need to have all of the patient data in one place. Unfortunately,...
-
I tried installing Ubuntu 22.04 server on VMware Workstation and got this message: Sorry, there was a problem completing the installation E...
-
I finally got my first complaint from the MPAA! Here it is, in its full glory! Dear Subscriber: This email is being sent to you by Road...
