Friday, September 7, 2018

Guide to using GPS with Airodump CSV Tools

There is an Android app included that will capture GPS coordinates from your Android device and save them to a file. Airodump CSV Tools will read this file to determine the GPS coordinates for the APs end devices in your airodump .csv file(s). Run it before you run airodump-ng and stop it after you stop airodump-ng for best results.

To improve its accuracy, you can run this program frequently while you run Airodump (tracker.sh does this once every five seconds). Doing so will keep the list of maximum power levels for each AP and end device in the files [prefix]-appower.csv and [prefix]-stapower.csv. After doing this, copy the GPS file from your Android device and run csvtools again, with the same -w [prefix] and csv file name, and specify the GPS file with -g.

GPS Example:
  1.     Start the GPS app on your phone.
  2.     Enter this in terminal 1: airodump-ng mon0 --output-format=csv -w packets
  3.     Enter this in terminal 2: ./tracker.sh
  4.     Drive around and find some APs
  5.     Stop the apps in terminal 1 and 2.
  6.     Stop the Android app.
  7.     Copy the GPS file from your phone to your computer.
  8.     Run this: csvtools -w test -g [gpsfile] packets-01.csv
  9.     This will generate test.kml, which can be opened in Google Earth.

Airodump CSV Tools v0.6 Released

After more than two years, I have released a new version of Airodump CSV tools.  It features many bug fixes, speed improvements, and a couple of new options.

Now on Github.

Wednesday, February 14, 2018

Crackling sound in Virtualbox

I had a problem with crackling sound after upgrading Virtualbox to v5.2, similar to the bug report filed here.  I found a forum post where one of the developers suggested upgrading to the latest test build, which did not work.  In fact, it made Youtube videos unwatchable and slow, so it made things worse.

Combing through more forums, I found an old solution which worked.  I had my CPU usage throttled to 90%.  The article suggested raising this to 100%, which resolved the issue.

I scaled down the number of cores I was using to prevent the VM from consuming all of my CPU resources.  Also of note is that I am still using the test version.  Host is running Windows 10 1709, and the guest was running Windows 7.

Monday, January 22, 2018

SSL Wrapper Tutorial


SSL Wrapper, found at http://cesanta.com/products.html, allows you to tunnel any TCP connection between two hosts using SSL.  However, the documentation for it is practically nonexistant.
To hopefully save you some time, I have implemented and tested it myself and will now share my notes with you.

Generating SSL Certificates

First, you need to set up your own CA using OpenSSL.  Then you need to generate two certificate/key pairs and get them signed by your CA.
#Generate a 2048-bit RSA private key for the CA:

openssl genrsa -des3 -out ca/ca.key 2048

#Generate the server certificate

openssl req -new -newkey rsa:2048 -nodes -keyout server.key -out server.csr -days 365

openssl x509 -req -days 365 -in server.csr -CA ca.pem -CAkey ca.pem -CAcreateserial -out server.crt

#Generate the client certificate

openssl req -new -newkey rsa:2048 -nodes -keyout chris.key -out chris.csr -days 365

openssl x509 -req -days 365 -in chris.csr -CA ca.pem -CAkey ca.pem -CAcreateserial -out chris.crt

Run the program

Server-side: HTTP server is running at 192.168.1.1, SSL wrapper will listen on port 443
(Using sudo to listen on privileged port 443)
sudo ./ssl_wrapper ssl://443:server.pem:ca.crt tcp://192.168.1.1:80
Client-side: Will listen on port 8080 for HTTP connections, will connect to the SSL Wrapper server at 192.168.100.24:443
./ssl_wrapper tcp://8080 ssl://192.168.100.24:443:chris.pem

MITM Attack

A correctly configured SSL Wrapper will not allow a connection if it is under a MITM attack.  (Using Cain in this example)


Google Chrome will display the message “localhost didn’t send any data” during an MITM attack.

MITM attack possible using incorrect configuration

If it is not configured correctly (not using a CA with client certificate), an MITM attack is possible.

Server-side: HTTP server is running at 192.168.1.1, SSL wrapper will listen on port 443
(Using sudo to listen on privileged port 443)
sudo ./ssl_wrapper ssl://443:server.pem tcp://192.168.1.1:80
Client-side: Will listen on port 8080 for HTTP connections, will connect to the SSL Wrapper server at 192.168.100.24:443
./ssl_wrapper tcp://8080 ssl://192.168.100.24:443


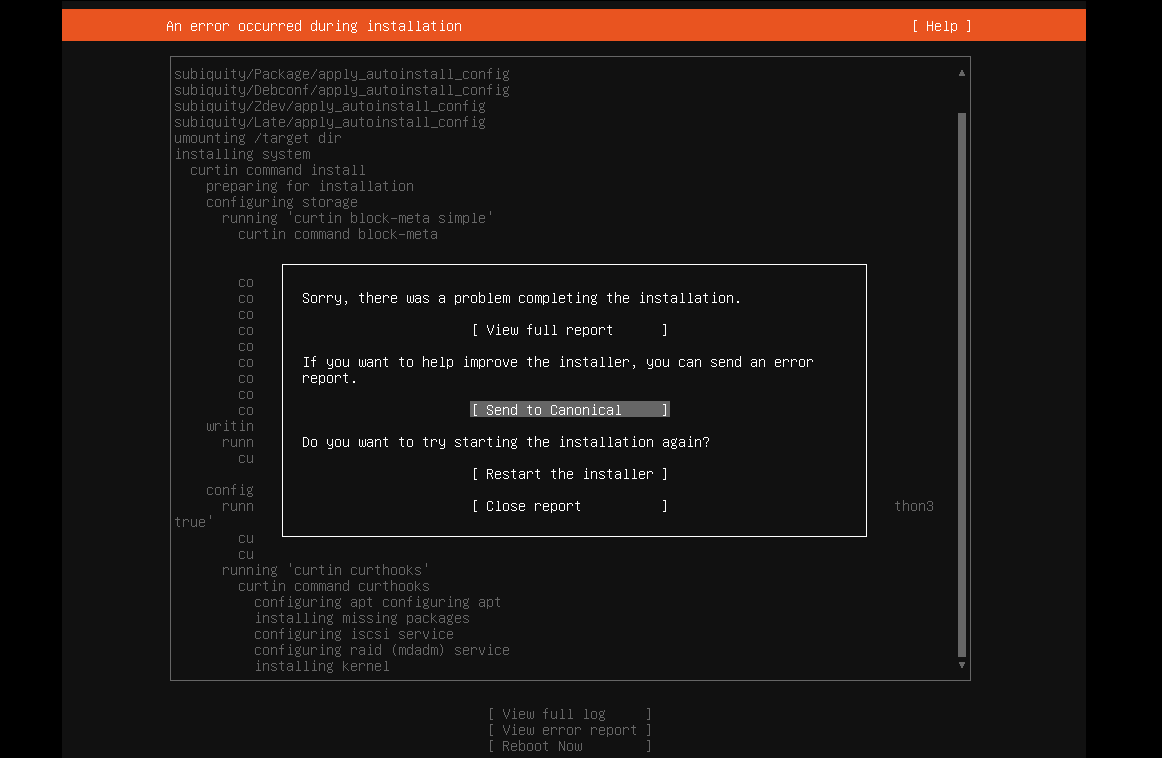
Ubuntu 22.04 on VMware Workstation Error

 I tried installing Ubuntu 22.04 server on VMware Workstation and got this message: Sorry, there was a problem completing the installation E...